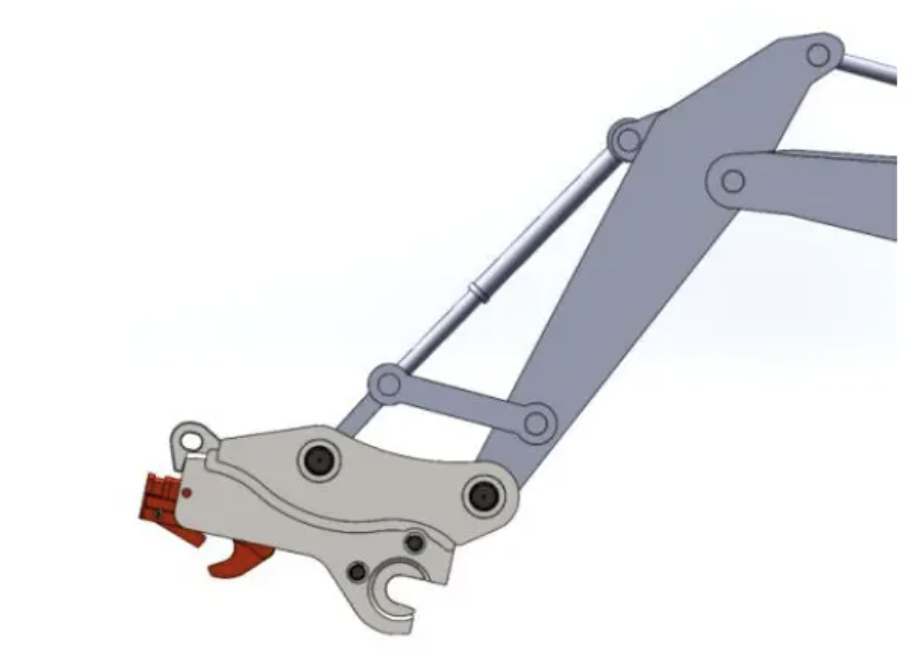
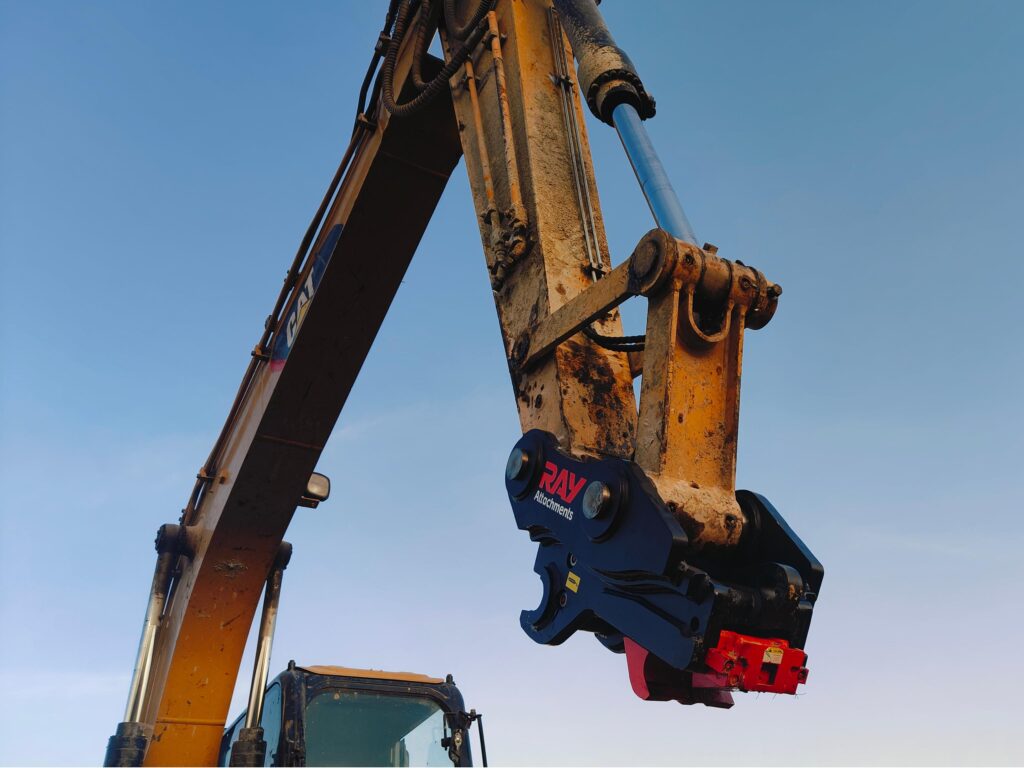
What is the Quick Hitch?
The Quick Hitch is a connecting device installed at the end of the excavator’s forearm. It can quickly replace working devices such as buckets and breakers through hydraulic or mechanical means. There is no need to manually remove the bolts. which can greatly improve working efficiency, enhance safety, expand the equipment’s “one machine for multiple uses” capability and reduce labor intensity.
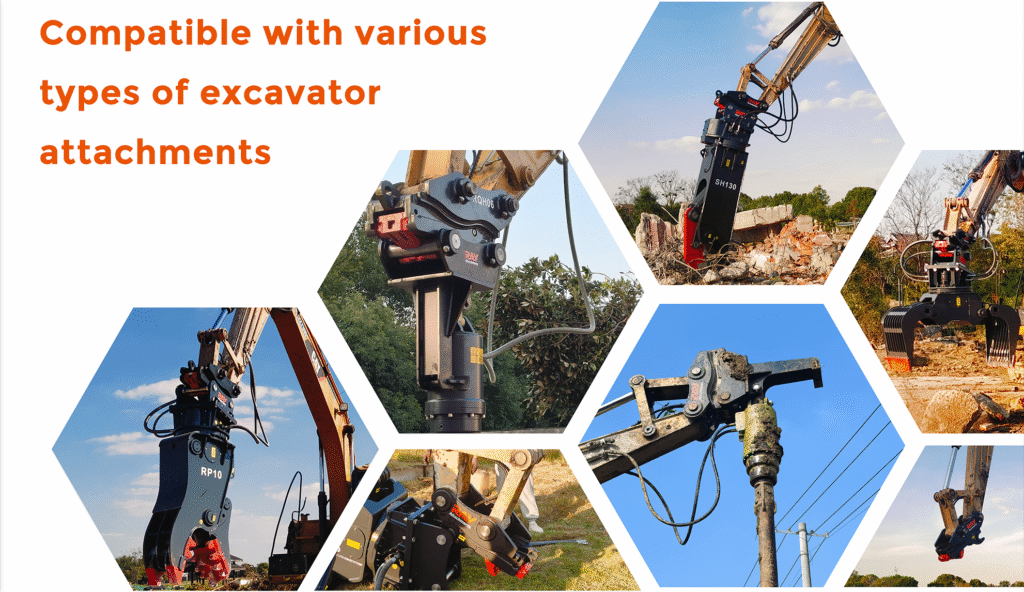
It is widely used in construction, mining, municipal administration and other scenarios where working devices need to be frequently switched.
What Kind of Quick Hitch We Have?
Hydraulic Quick Hitch
Through the rotation of the rod to control the spring contraction, control the claws of thecontraction
Turn the handle clockwise, the spring will tighten, and then drive the pin retract, the quick hitch will be opened make the shaft toward to grasp shaft of attachment.Turn the handle counterclockwise, so it can be tightened to ensure that it can grasp the shaft of the attachment. Learn More>>

Advantages:
- Free type with wider cylinder stroke, fit to wider excavator range.
- 100% match your excavator pin size.
- High precision(tolerance can be 0.18 μm).
- Blasting process with perfect welding.
Multi Quick Hitch

Advantages:
- Welding Technique: 15 years experience, full welding and not easy to crack.
- Grease Nipple: Make pin not easy to wear.
- Three-lock structure (hydraulic lock, safety hook, limit block): Front jaw lock and Rear safety lock make the operation much safer. Which embrace the pins tightly even if the cylinder suddenly inoperation.
- Imported oil cylinder and not easy to damage.
- Without safety pin and excavator operator can operate it in the cab alone.
- Wide range of application: Compared with fixed C to C distance(A) of routine quick hitch, multi quick hitch is more flexible. It is suitable for all attachments with the C to C distance(A) within its range.
Tilting Hitch

Advantages:
- Flexible operation: 140-180° tilt angle make the project operate flexibly even in the tight spaces.
- Safety: Triple-lock design ensures reliability and security.
- Convenience: Fully automated operation eliminates the need to leave the driver’s seat.
2. How To Choose?
Usually we will recommend according to the model of the excavator owned by the customer, and according to the excavator connecing data. ( Pin diameter, C-to-C distance and Arm width)
| Model | Unit | RQH01M | RQH01D | RQH02M | RQH02D |
|---|---|---|---|---|---|
| Carrier | T | 1~2 | 2~4 | 2.5~4 | 4~6 |
| Pin diameter | mm | 30 | 35/40 | 40/45 | 40/45 |
| C-to-C distance | mm | 115~140 | 160~200 | 185~220 | 215~250 |
| Arm width | mm | 100~125 | 110~125 | 125~140 | 145~180 |
| Oil pressure | Bar | 40~248 | 40~248 | 40~248 | 40~248 |
| Oil flow | L/min | 10~20 | 10~20 | 10~20 | 10~20 |
| Hose | Inch | 45661 | 45661 | 45661 | 45661 |
| Unit weight | Kg | 21 | 31 | 47 | 60 |
3. How To Install?
3.1 Install the Quick Hitch
- Open the cylinder, and ensure slide is fully extended with front jaw safety lock open.
- Line up attachments and engage front attachments pin.
- Close the cylinder. This will retract the slide mechanism and this will visibly lock the front jaw safety latch around front attachment pin.
- Open the cylinder again. The sliding mechanism will extend and engage the rear slide hook onto the rear attachment pin.
- Proceed with connection test.
[双锁快换动画操作视频-20240428.mp4]
3.2 Install the piping
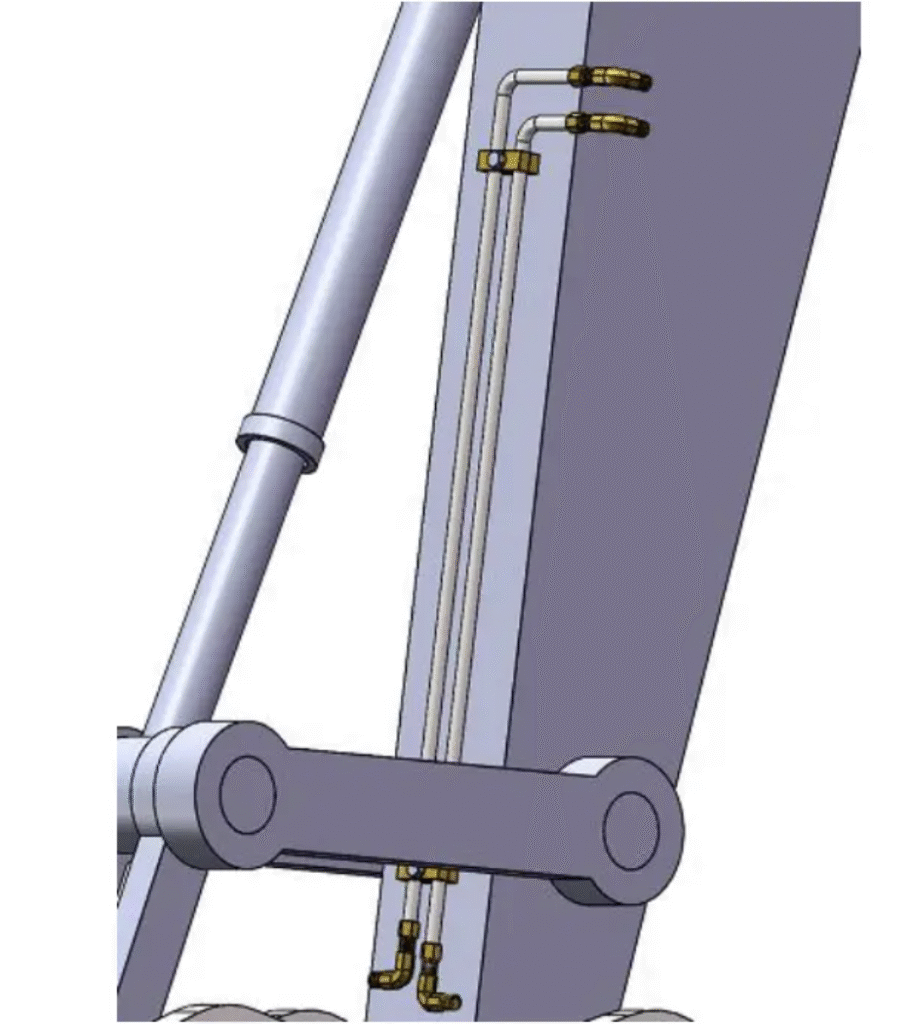
1. Weld the pipe clamp on the small arm, put the hard pipe into it, connect the upper and lower ends of the hard pipe with 90° ferrulefittings, adjust the angle and tighten it.
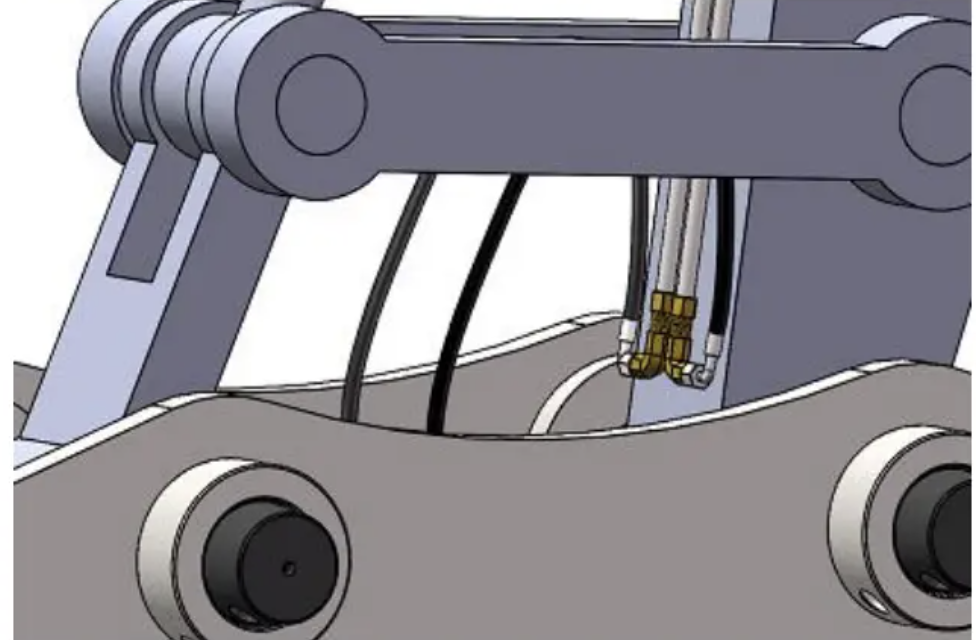
2. The lower end of the hard pipe is connected to the hose that goeswith the quick-change fitting, and the hose is connected to the cylinderfitting of the quick-change.
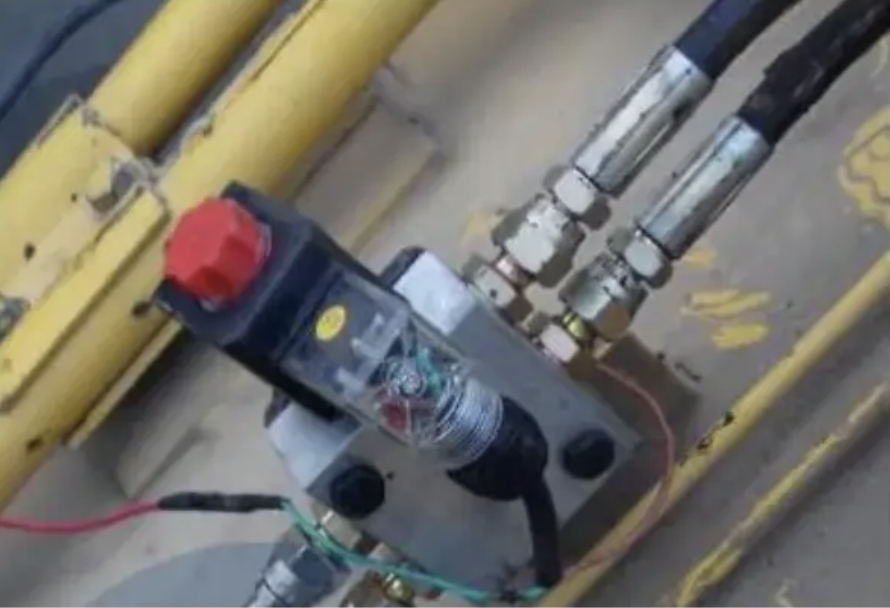
3. Hard tube upper end with the longest hose along the arm down to the arm fixed pin, the distance is not enough when you can use the pair of wire and then connected to a section of hose, two hoses to the solenoidvalve A/B port, the installation of the solenoid valve location is not fixed, can be installed in the cab under the floor, r, can also be installed in the tailend of the arm (side-mounted excavator).

4. Use the last two hoses to install one end in the P/T port of thesolenoid valve, and the other end correspondingly in the P/T port of the traveling foot valve (add a tee to the traveling foot valve to connect with it).
5. When connecting the oil pipe, the air should be bled out, After all the pipes are connected, be sure to check the hydraulic oil, such as insufficient hydraulic oil in time to replenish, and then start the excavator to check whether the pipeline is connected incorrectly.
6. After the hydraulic pipeline connection is correct, connect the powerswitch. First use the multimeter to find a positive, open the cab under the seat of the fuse box, the positive line connected to one of the backup power supply, y, the switch, insurance in series, the switch is fixed in the cab panel or side panels (to facilitate the operation and ensure that it is not easy to match with the wrong touch), and then the switch power line from the cab control panel underneath the line connected to thesolenoid valve, the solenoid valve of the other end of the line connected to the hitch.
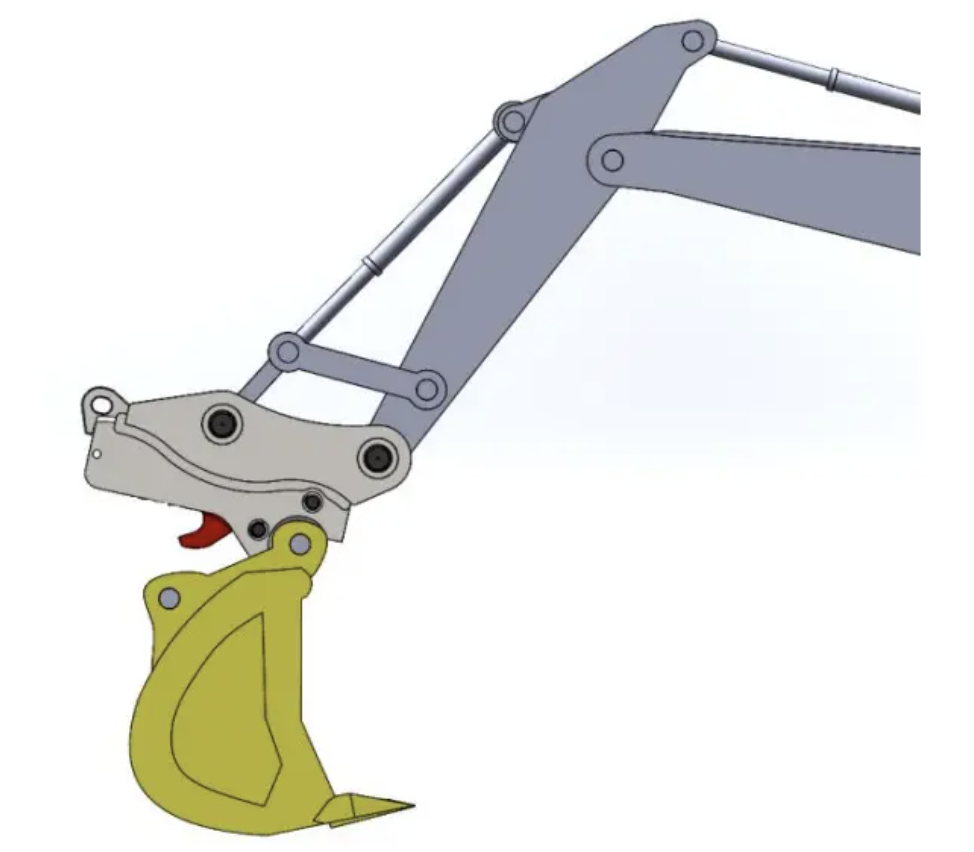
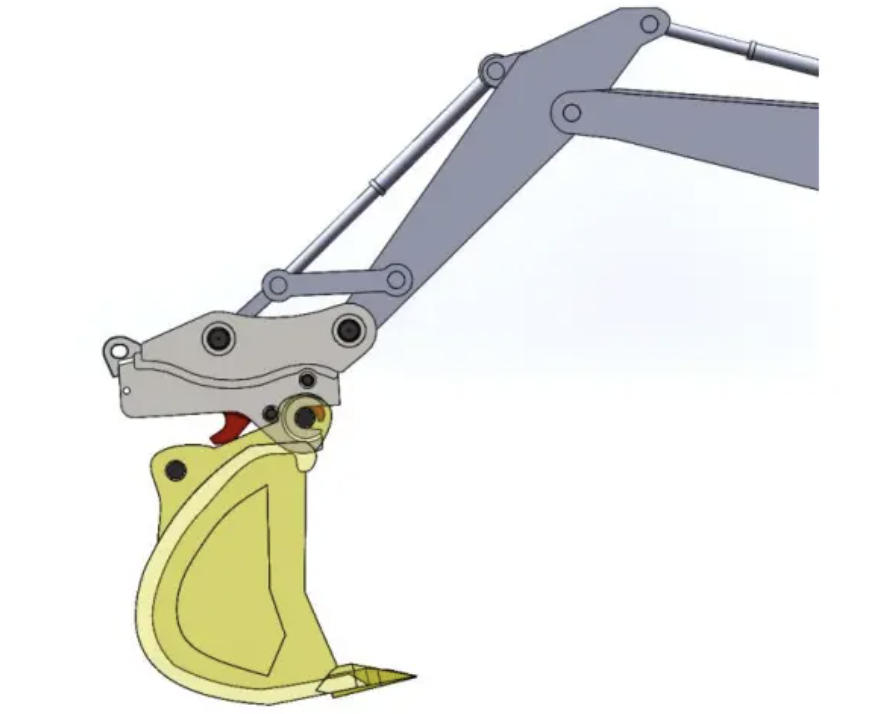
3.3 The Operation For Connecting Hydraulic Attachments
1. Activate the power supply of the control box, the buzzer sounds, click on the open button, start the hydraulic pump, as shown in thefigure, extend the “quick connector” hydraulic cylinder, r, open thelocking mechanism of the fixed shaft end.
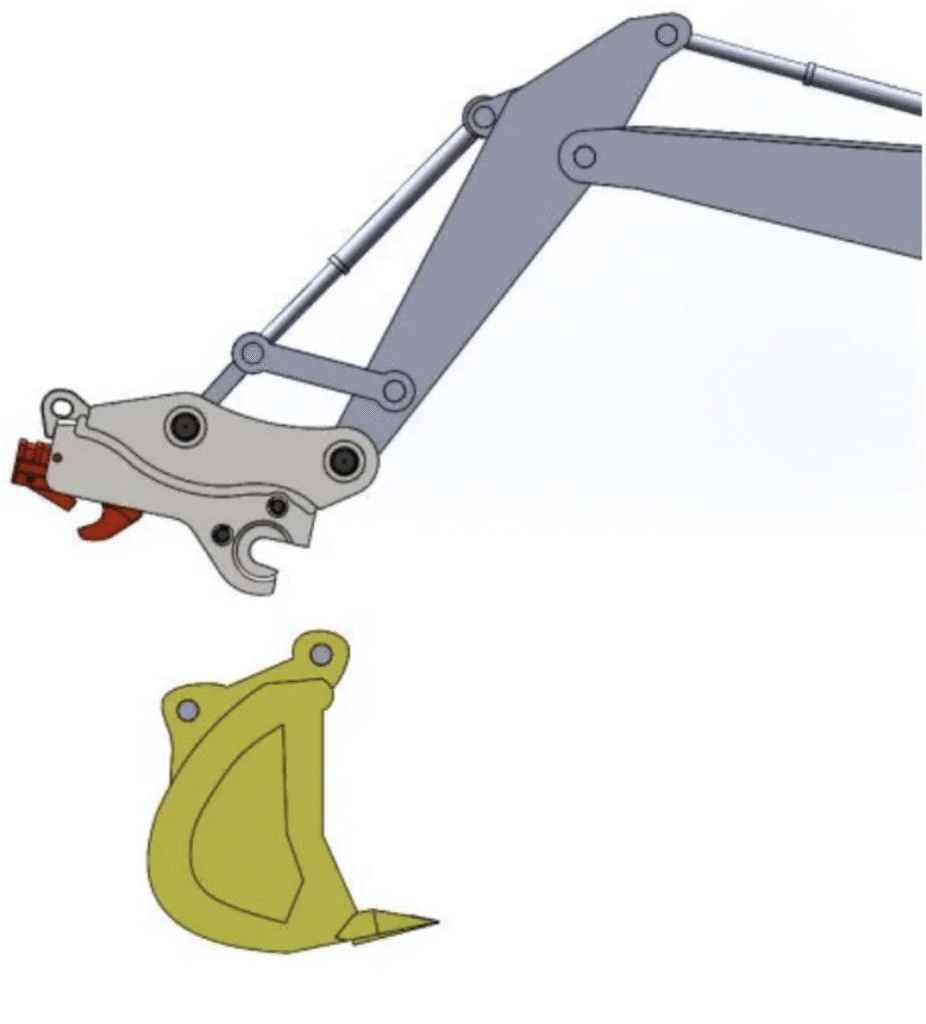
2. After checking that the locking mechanism at the end of the fixedshaft is fully retracted, align the Quick Connectors with the bucket you want to pick up.
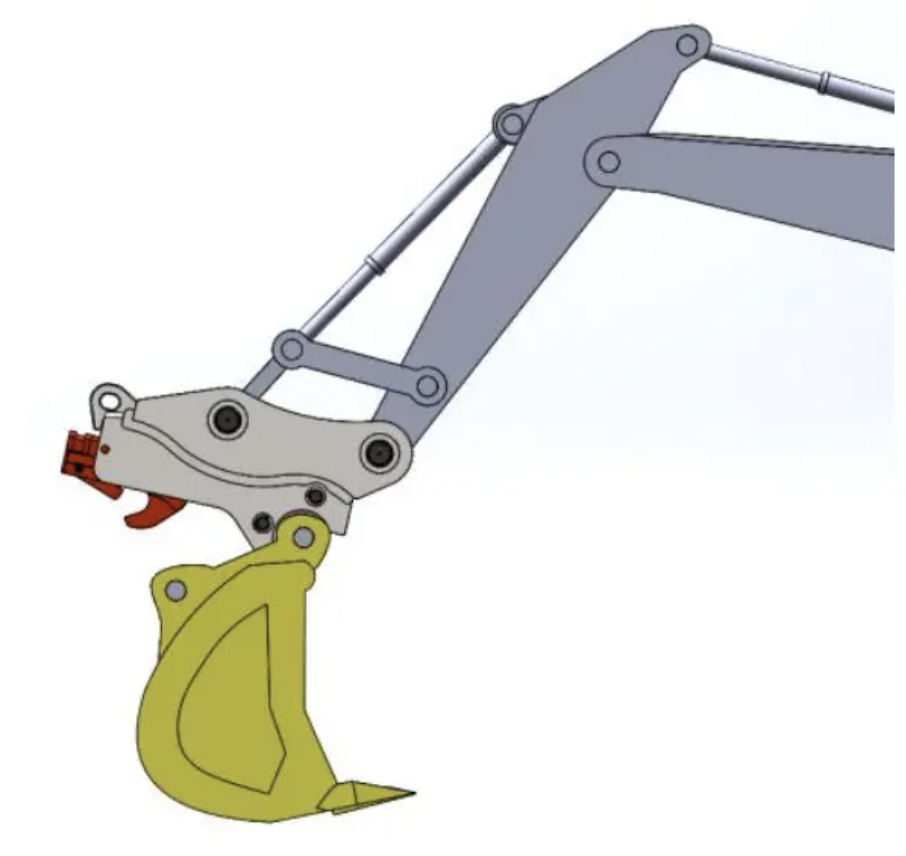
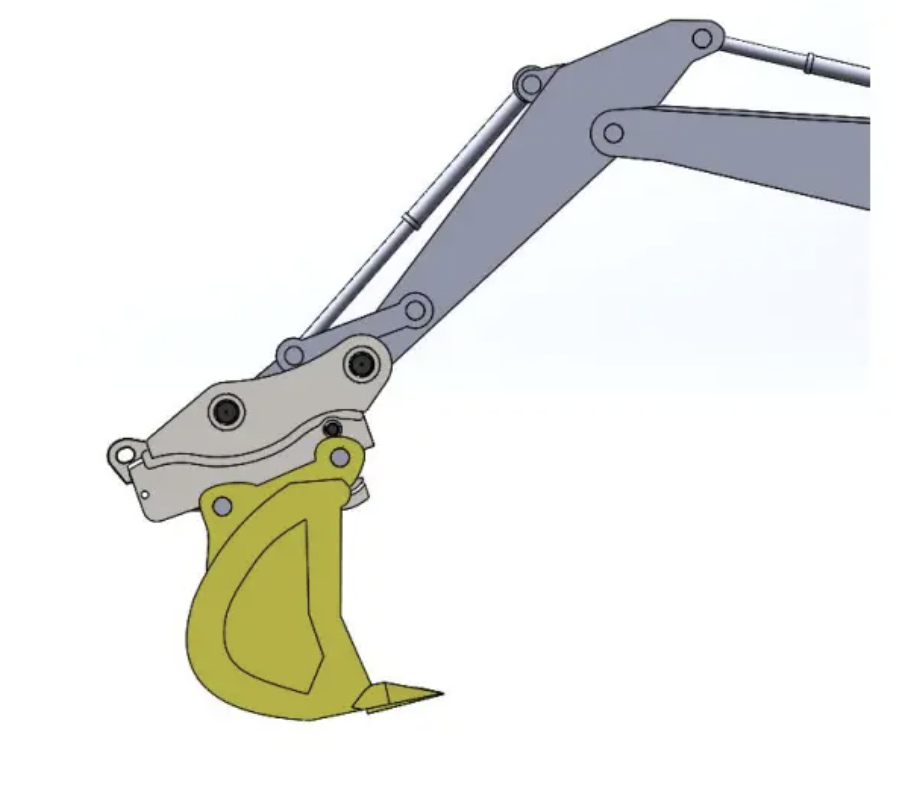
3. Connect the fixed shaft end to the bucket’s corresponding connecting pin.
4. Click the close button to retract the “quick connector” cylindercompletely, y, so that the locking mechanism at the fixed shaft endcompletely locks the bucket connecting pin, and then the lockingmechanism at the movable shaft end opens.
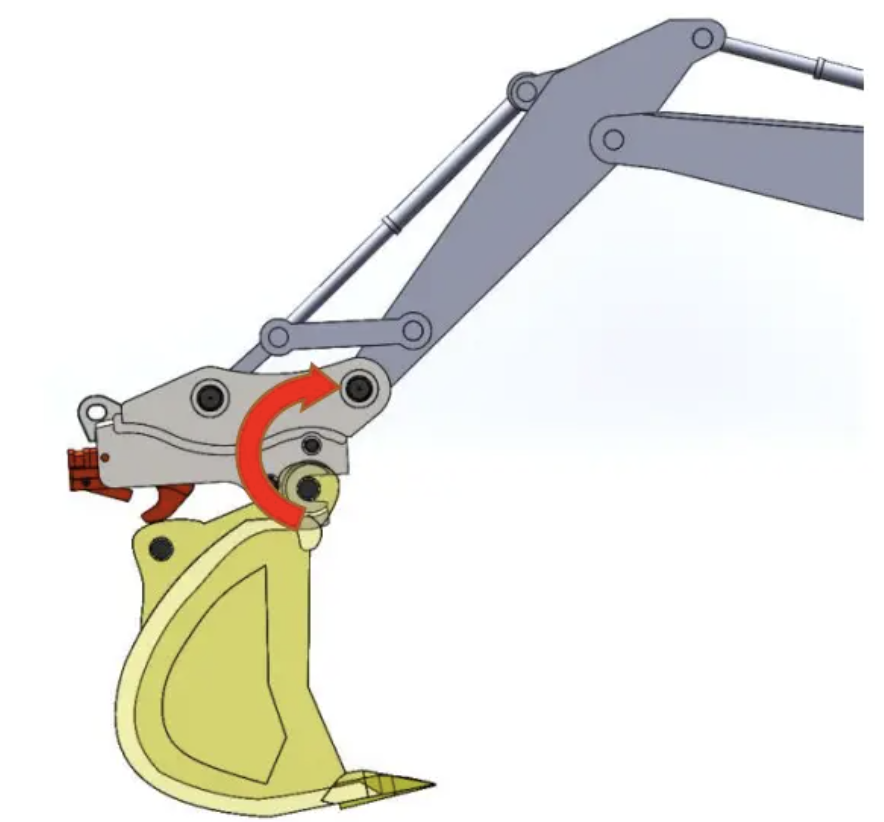
5. Extend the excavator boom cylinder and align the Quick Connectorwith the bucket you want to pick up.
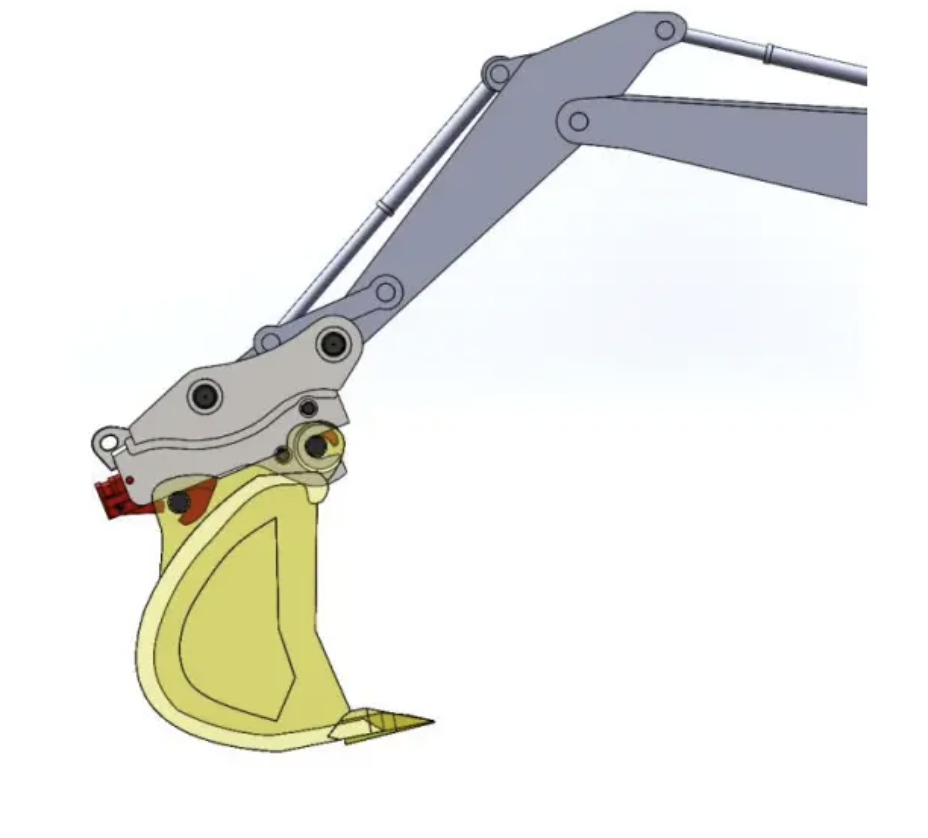
6. Click the open button, start the hydraulic pump, extend the hydrauliccylinder of the “quick connector”, and lock the locking mechanism of themovable shaft end and the fixed shaft ft end to completely lock the bucketconnecting pin, as shown in the figure.

7. Before operating, rotate against the ground and away from themachine, test pressure on attachment, place bucket in a safe position, gently squeeze up and down to fully connect. Otherwise do not continueto work.
3.4 Disconnect the bucket
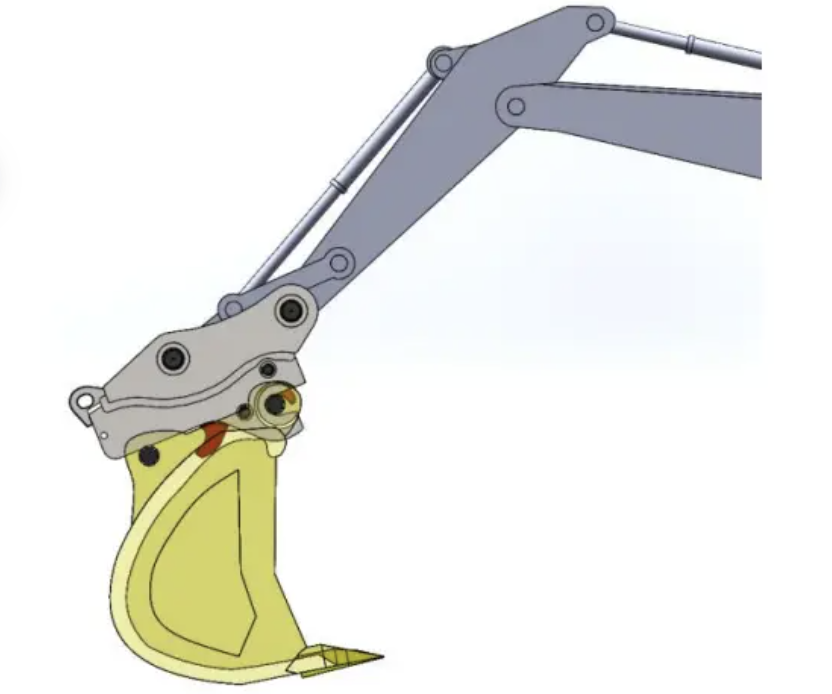
1. Activate the power supply of the control box, the buzzer sounds, clickthe off button, activate the hydraulic pump, as shown in the figure, retract the hydraulic cylinder of the “quick connector” and open thelocking mechanism of the movable shaft end.
2. Shorten the excavator boom cylinder and lift the front of the QuickConnectors to the bucket you want to disconnect.
3. Click the open button to activate the hydraulic pump, as shown in thefigure, extend the hydraulic cylinder of the “quick connector”, extend thehydraulic cylinder of the “quick connector”, and open the lockingmechanism of the fixed shaft end.
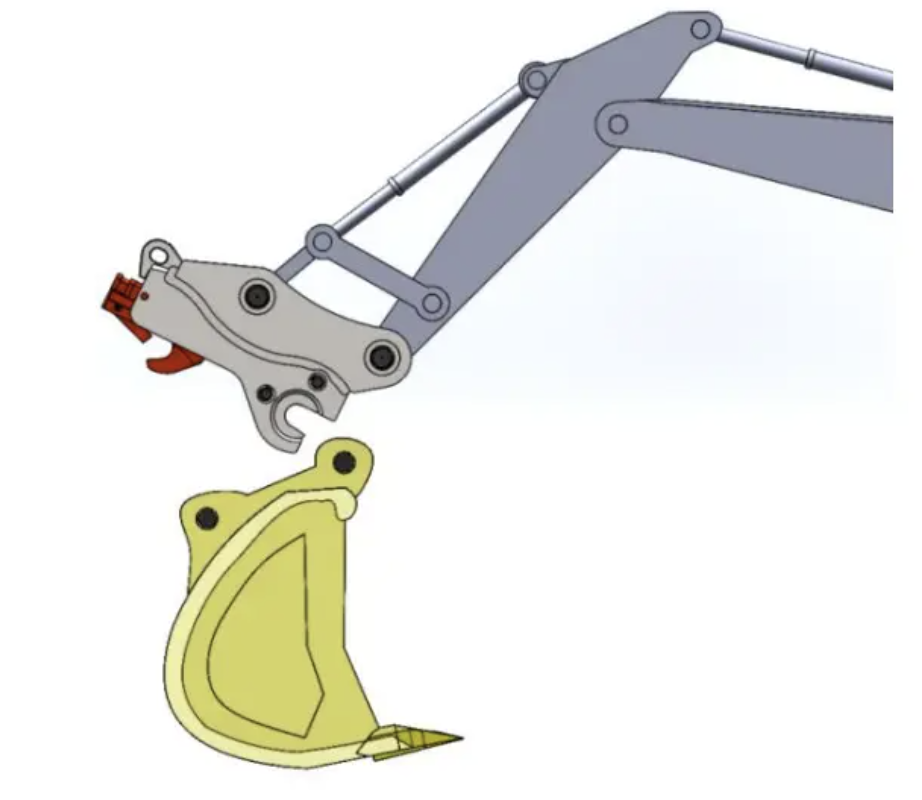
4. Lift the excavator arm and completely disconnect the QuickConnectors from the bucket.
4. Repair and maintenance
4.1 The Use of Maintenance Precautions
- Never put your hand inside the machine when operating the quickconnector, r, and do not touch the rotatable parts with your hand. It is easy to get hurt that way.
- When disassembling and assembling the cylinder, be careful not to let impurities and moisture into the cylinder.
- Remove any dirt or impurities from the quick coupler before lubrication and maintenance. Maintain the quick coupler after every five times of alternating use by filling each grease nipple with grease three times.
Note: *Lubricate the grappling hook twice a day.
- During the operation of concrete transportation, the cylinder shaft and the cylinder rod are very easy to stick to the concrete, making them stick together, so be sure to clean the concrete after the operation.
4.2 Precautions For Inspection and Maintenance
- Bolts: Check whether the bolts at the connection between theassembly shaft and the grappling hook shaft ft are slack, and whether
- Oil cylinder: after every 120 hours of work, check whether the oil cylinder is damaged and oil leakage.
- Piping: Piping must be installed when installing quick connectors on the excavator. Be sure to check the pipeline for oil leakage and damage as well as connection before construction every day.
- Tiger mouth and grappling hook: after every 120 hours of work, it is necessary to check whether there is wear and tear, deformation and cracks on the parts connecting the bucket or excavator attachment.
- Check the bolt cap: every 120 hours of work should be checked on the bolt and bolt cap, so that it is firm and not slack, in order to prevent accidents.
- It is hoped to keep the cylinder rod part not to get into the impurity and not to be damaged. If not keep that will lead to oil leakage of the cylinder.